Thursday, June 30, 2016

Annual stay-cation!

Now that the school year is over, I've finally been able to take some much needed time off. I usually take the week after graduation off because let's face it - I'm pretty tired from photographing all of the end of year events at my school.

When I was young, my family would pile into the car and drive to Florida. While I'd LOVE to go down to Florida and visit my family, it's just not something that's in the cards right now (I did manage to squeeze in a much-needed spa day though!). However, I am using the time to be productive around the house (which, after looking back at my Facebook posts over the years, is apparently what I do whenever I take time off) and so far I've been able to complete a good amount of tasks.

I finally painted over the stenciling on the bathroom walls and installed the trim around the vanity mirror. I still need to putty the miter joints, but it's looking better all the time.

Yesterday I managed a good scrubbing and polish of the living room hardwood floors. Despite being scratched nearly to oblivion (thanks to my two dogs, three cats and two people) the floor looks a lot better than it did. I use the Holloway House floor finisher for high traffic floors and it looks lovely. Because I have a lot of furniture, it took nearly two hours to do the whole room as I had to move the furniture to one side of the room, do two coats, then move it to the other side, and do the two coats on that side. Lesson learned - it would have been a good idea to have the hubs move the very heavy and solid furniture (sofa bed and large, heavy dining table) because I'm quite sore today.

One of my favorite things to do when on stay-cation is to paint. I've fallen head-over-heels in love with chalk paint and I'm thankful that my local arts and crafts supply stores carry a wide variety for me to try. I've had very good luck with the Folk Art brand and am very fond of the castle grey color. It's a nice warmish-greige and looks lovely when antiqued. (I used this color on my two cane-back chairs and plan to use it on my French provincial dresser that I'm using at my television stand)

I haven't tried Annie Sloan, mostly because I don't know of a distributor close to me, and secondly, it's pretty expensive stuff. Since I'm working on multiple house projects, I'm trying to keep costs relatively down. Plus, the Folk Art chalk paint has worn fairly well so far. I've also used Americana Decor and I like it okay, but it's definitely a lot thicker than the Folk Art brand. I find it works a lot better if you have a damp brush, otherwise it can be a bit cakey.

Speaking of Americana Decor - I'm using their "vintage" color for my next chair project.


I think it's a lovely color - very similar to the Palladian Blue color I have on the walls, which makes it a nice color for my dining chairs. My grey cane back chairs have cushions the same color, so it all ties in nicely. 

I think I will keep it simple for these chairs and just distress them a little and add clear wax and be done with it. I'm still on the fence about adding a design or not to the chairs. They're fairly simple, but I don't want to "over-do" it with them.  

As you can see in the photo - I've used these chairs in many many many painting projects. There are paint splatters all over them. I found the easiest and fastest way to get the paint off of these chairs (mind you, these are cheap-o chairs I got with a dining set at Walmart 7 years ago, so I wasn't worried about anything happening to them) is to use Goo-gone and a putty knife. This combo gets the paint off really quickly without having to sand the globs down. (It also got paint, dried putty and even dried mortar off of my floors). After I wiped up all the dried paint, I gave it a good clean with an all-purpose cleaner and let it dry. 

I applied two coats, and like I said, with the Americana Decor paint, a damp brush works a lot better for a thin, even coat. I applied two coats to the chair, letting it dry completely between coats. 

The next step depends on a few things. If I want to add a design, I'd go ahead and do that. I have a few ideas in mind - maybe something with stripes, or something like Miss Mustard Seed's designs (I seriously love everything she does - especially the adorable hand-painted dressers) or even use my stencil on the seat. Again, still on the fence. 

Once a design is painted, then you can distress and clear wax. I I don't decide to do a design, I'll just distress and clear wax. After clear wax you'd antique if you wanted to, but I'm not planning on antiquing these chairs. 

I'm hoping to finish two of the chairs today, two tomorrow, and then possibly start the dresser on Saturday. So. much. paint. I may even get around to doing the molding for and painting another door. 

Wednesday, June 22, 2016

More trim work and pallet hoarding

Now that I have one door down, I decided to start working on some other trim-related projects around the house. A while back I took the trim off of our first-floor bathroom vanity and now I'm finally getting around to replacing it.

Took a quick couple of measurements and went out to my miter saw and cut the trim. One thing I've learned about cutting with the miter saw, is that you need to make the cut just outside of the line otherwise things won't line up correctly and you end up with gaps in the trim.

So, I cut the pieces, sanded the cut ends and made sure they fit around the medicine cabinet. After feeling good about the fit, I decided to paint the trim first before attaching it to the wall.

While I was thinking about it, a while back I decided to try stenciling my bathroom wall. While that wasn't the worst idea I've ever had, I found out that I wasn't terribly good at stenciling around corners.


You can see that for whatever reason I didn't continue the pattern into the corner. Oh well. I still really like the navy blue above the white bead board so I'll just paint over the stenciling. I really do love this stencil though! I bought it from Cutting Edge Stencils and it's their Oceana Damask one. I think it will be lovely on my antique dressers that need to be redone (I have a neat idea I want to do with them over the summer.)

Like most of my projects, I realized I couldn't paint the walls over unless I sanded them smooth, There were also a few spots that when I was doing the stenciling, the tape to hold the stencil to the wall ended up peeling the paint a bit, so I needed to sand and putty those spots too.

Now that those areas are puttied and dried, I need to sand them smooth and I can paint over the stenciling and then add the trim. It's much easier, if at all possible, to add trim work after painting so you don't have to worry about cutting in carefully or taping - especially when using a relatively dark wall color.

As far as the rest of the bathroom goes - there's still quite a bit of work to be done. I'm hoping to find someone that can re-glaze my tub. I plan on also redoing the floor and shower surround, and getting a new top and faucet for my vanity.

I'm also working on another project that I'm sure many of you have seen on Pinterest. Yes, I'm talking about the infamous pallet wood wall. I really love how they add a bit of warmth and texture to a room. I've had the light wood paneling for quite some time now, and I don't think there was ever really a moment that I was totally in love with it.

The walls in our house are plaster and when we pulled the Wall of Mirrors off, there were a few spots on the wall where the plaster was ruined. I tried a few things to fix it - mostly trying to patch the plaster, and then again try to re-texture it - both of which failed miserably - so paneling was the next option that wasn't going to cost me whatever it would cost to have someone come out and try and fix it.

At this point, the amount of damage done would require redoing the drywall and plaster on that entire wall. Ugh.

When I saw the pallet wall I thought that would be a fun idea. I like rustic style things, and with Fixer Upper type styles being very popular, it's certainly easy to find tutorials and ideas on how to make it work in a variety of spaces. I'm also not that concerned about resale as it is a really popular style now (and probably for a few more years at least) so it's another very inexpensive way to upgrade a wall and add some personality.

I know a lot of folks will say that you want to make your house as "bland" as possible for people to walk through, but I don't necessarily agree with that. I think by styling your house intentionally so people can see how you can live there and do it in a way that's up-to-trend, you will have a higher chance of selling quickly. Granted, I'm not a real-estate agent, but that's how I would feel walking into a home. (To be fair - I can "see" what to do to a house that needs some TLC when walking into it, but if it's already done, I'd be more excited about buying it - that's what happened with the first house we put an offer on).

The wall is 8x14 and so far I have 5 pallets saved up. Luckily I can get them for free from my work and another office on my way to work. I recently bought a sawzall so I can rip them apart hopefully pretty easily. It will probably take some time to collect enough wood to create my wall, but it would be great if I could do so by the end of the summer.

Tuesday, June 7, 2016

Operation Florida!

I've taken what can be considered an extended hiatus from blogging. Work got pretty intense, as well as helping run my school's drama club, and generally just forgetting that I had a blog in the first place.
Sure, I had grand plans that by blogging I'd be oozing creativity and come up with adorable weekly projects that I'd take a million artistic photographs of and loads of people would "ooh" and "aah" over every detail.
Yeah, no.
I mean, I've done projects. I just haven't photographed or written about them.
But, we do have a possible major project in the works.
The hubs and I have talked extensively about relocating over 1,000 miles to Florida to be closer to my family. With having a kid becoming more of a central focus for us, the thought of "well, who is going to help us?" has been raised more often than not. We're also thinking that the cost of living down there is so much less than where we live now - that we could afford to buy a decent house and fix it up to our liking without nearly as much trouble. It helps also that I could take the time away from working to raise a kid. Lastly, my fibromyalgia has not gotten much better over the last few years. I feel awful during the cold/damp parts of the year, which where we are lasts around 7 months. That's a long time to feel crappy.
Which, of course, when planning a major move, there are major projects that need to be completed first.
A few updates first:

  • We did get most of the attic finished. We moved our bedroom to the attic in September even though it's not completely finished. We still need to do some trim work, add doors to the bathroom and closet, and have the tub properly plumbed. 
  • I attempted to stencil paint the bathroom downstairs. Bad plan. I'll be repainting that. 
  • The most recent accomplishment was finishing the pantry. I repainted the inside and the shelves and made the door all pretty. I just put the final coat of paint on the pantry door and will hopefully hang it tomorrow.
All of our doors are plain, flat panel doors that are stained an orangey-oak color to match our floors. Blech. After 60 or so years, the finish has worn and restaining it would just be a pain (not to mention... yuck... orange!) So, I decided to paint it. I figured it would either be white or grey - as I'm trying to keep everything relatively neutral. Since the door is just a flat panel, I decided that I'd try to add some interest by adding some trim.
Now the hubs is on the road for his new job a lot, so most of the projects I'm trying to get finished will need to be by my own power. While this is a bit scary, it's quite empowering too. Knowing that I can take my time is helpful, and this pantry project has spanned over the course of a month or more while I worked on it a little at a time on weekends.
Here's the sad, flat panel door:


So, in order to add the trim, I needed to learn how to use our miter saw. I figured that I'd just try and figure it out and luckily it's pretty straight forward. I managed to get the trim cut and glued to the door panel in an afternoon.


For my first go at cutting trim, I think I did pretty well. My joints weren't perfectly tight, but they were close enough that a dab of wood putty fixed it.


I decided to go with grey paint since my trim is already a bright white. I used Valspar Door and Trim paint since it's specifically designed to withstand the everyday wear of a door. We'll see how it holds up. I'm debating on painting the trim I cut white as that would make it stand out, but I think I'll live with it a while first before painting it. It looks pretty awesome as is though!

Of course I had to text the photos to my parents. Dad was proud. He said I must've "held the light" as a kid. :) I added that I still had all my fingers too.

I'm hoping to start on the trim around the main floor bath next (and repaint the bathroom after my stencil mishap).

Tuesday, July 29, 2014

I'm apparently horrible at blogging, and updating my house

This year has been one of those where time just flies by without even realizing it. All of a sudden it was July and I noticed we haven't made much progress on anything.

So, I challenged my husband to finish the drywall in our attic before my birthday on August 13. Of course, I'll be helping with mud and sanding (and after it's all done I will be doing the painting) and overall cheerleading to get it all done by this deadline.

I'm hoping by the end of the year the bedroom will be finished enough where we can move all of our bedroom things and start 2015 in our little bohemian attic retreat.

Then in 2015 we can tackle the attic bath - which is sure to be a total nightmare to finish a fun journey.

While the drywall is being finished, I'm working on paint colors and the overall design of the space. Originally I wanted to paint it like my old bedroom when I was a teenager - blue sky walls with clouds. The more I thought about it, the more I realized that it would be a pain to do (literally and figuratively), so I'm going to opt for a stenciled feature wall since that is something I can do without hurting myself and with a much more guaranteed outcome than a free-form painting.

Another part of the process that's "gumming up the works" is that we're essentially starting from design scratch. We're planning on getting a new bed too and since that is bound to be a rather large investment since we need something other than your average run-of-the-mill bed due to my fibro and now Garry's back problems, I'm planning on getting new linens since the bed will be a different size.

So, eventually I'll get around to making more updates.

Eventually...

Wednesday, January 15, 2014

Little ways to keep resolutions

It seems like a lot of bloggers out there are coming up with lists on how they keep their New Year's resolutions, and like those folks, I'm falling in line with my two cents.

The hardest resolution for me to make was to clean the house more. I know that sounds like it's a bit of a shock, but the emotional stuff I'm getting a hold of, and the decorating stuff I'm fairly good at once the funds are there to do so. But, cleaning the house has always been this daunting task that I loathed to do.

Okay, I still don't find cleaning terribly enjoyable. However, I do enjoy basking in the glory of a clean and uncluttered house more than my dislike for cleaning it. Finding a way to do that without breaking myself (physically and emotionally) is key in this process. Here are a few things I've done (so far) to help in that process.

  1. Mini cleaning kits in different areas of the house. I'm more likely to clean something really quick while I'm in a room if the cleaning products/tools are already in there instead of a centralized place (under the sink in my kitchen). For instance, in the bathroom you could keep some cleaning wipes and magic eraser sponges under the sink, in a basket on a shelf, or if you have room - in your medicine cabinet. I also keep a bottle of Method shower spray in my shower. My plan is to have little mini kits in most of the rooms, tucked away, but not so much that I forget they're there. 
  2. Keeping with a routine. I'm certainly one of those people that does well on a routine. For example - I've started making the bed right before I get dressed for work every day. It only takes a few minutes, but it's so nice when I go to bed and the bed is made. The whole room feels a lot cleaner. Even though I haven't done this yet - I do plan on coming up with a monthly "schedule." So I remember to do things like wipe down the baseboard heat element, scrub the shower, and clean the windows. 
  3. Enlisting help. I know there are folks out there that feel cleaning is "woman's work." Thankfully neither I or Garry believe in that and he is good about doing his share of chores - especially ones that are physically difficult for me to do. 
  4. Having the right tools. Because of my fibro - I need to have cleaning tools that are as efficient as time-saving as possible to keep me from over doing it. We bought a Roomba last year (and it has kept up with the dog/cat hair surprisingly well) and other utensils to remove pet hair from the furniture relatively easy. To be honest - I absolutely love Method brand products and magic eraser sponges. 
  5. General upkeep. This one we're working on slowly, but surely. It's easier to feel like a room is clean if the trim if paint isn't chipping, old and discolored tiles are replaced, and so on. One of the bigger and more on-going projects in our house is to replace the trim - as most of it is in bad shape. We replaced one length of it and were amazed at how much cleaner the room looked with bright white trim. 

Monday, December 30, 2013

New Year.. and some resolutions

I've never really been one for resolutions. Every year I see countless friends set these lofty goals and then a few weeks later completely forget about them or just fall off the wagon.

I've been there a few times. I've resolved to lose weight, take better care of myself, eat healthier, all of those things. Sometimes it will stick, but most often the goals are too big or ambiguous, and I just forgo the whole thing. It's been a while since I've even thought about making a resolution, but I think this is the year...

I resolve to make 2014 a good year.
This seems like it totally goes against what I just said about something being too big or ambiguous, but hear me out. I'm resolving to improve my outlook. For the last year or so I've been feeling pretty grim and finally things seem to be heading in a direction where I can encourage myself to have a more positive outlook. I want to feel less like a victim and more like a warrior. Or at the very least, a capable, strong woman.

I resolve to clean the house more.
This one is pretty obvious, but because of some of the big changes we're expecting in 2014, I'm going to make more of an effort to clean the house more often. A lot of the times baseboards go untouched, nooks and crannies are caked in dust and grime, and the furniture could be better cared for. Part of the resolution will include having a little more of a scheduled cleaning regiment, but the key here will be not to beat myself up over it if it doesn't get done.

I resolve to work on allowing myself to be the person I want to be.
I've been working on that a LOT this year and I think carrying it over into 2014 is a good idea. This year I dyed my hair BRIGHT blue, got my nose pierced, and tattooed half of my arm. While not everyone agreed with those things, I did them because I wanted to - and I'm happier because instead of caving into other people's opinions, I just did what I thought would be fun. The funny thing is - I get so many more compliments now that I let myself do that than I did before.

I resolve to work toward lowering the amount of medications I need to take. 
This one my doctor's will be happy with - and something that I've been working on for a while now. I doubt I will ever be medication-free, but cutting back a little here and there is always good.

I resolve to continue to make my house a home. 
This sort of goes with #2, but it's more focused on improving than cleaning. We're in the middle of our attic renovation and I'm sincerely hoping by this time next year it will be finished - or at least very close to it. We're paying for everything in cash, so that generally takes a little longer to accomplish. But - if we can make what I have in my head a reality - it will be a heavenly oasis of comfort. I'm also hoping we can work on a lot more house projects this year now that my hubs is working a well-paying full-time job.

I resolve to be less of a hermit and get out of the house more often.
This last year I wanted nothing more than to just stay in my house and never leave. In 2014, I want to try and get out more with friends, go do and see some of the fun things going on in our area, and just overall be a little more social and less socially-awkward.

That's it. :) It was hard to put all of what I wanted to do in one resolution, so I did a few to cover the basis. Of course, I'm going to try my best to do all the other things like lose weight, eat healthier, blah blah blah, but I'm not going to put that kind of pressure on myself to resolve to do them. I want to get down the basic things that I'm resolving to do as listed above because I feel they are the most important in my life right now. While being a healthy weight is a good thing, I'm hoping by conquering some of these issues as listed above - the weight loss (i.e. exercising and eating better) will come along with it. If not, well, at least I'm working toward feeling better about myself and not letting my decision to lose weight be controlled by vanity alone.

I'll keep you posted on some of our upcoming house projects! 2014 is going to be a great year!

Saturday, July 27, 2013

Kitchen chalkboard wall and pot rack

You'd think I'd get tired of kitchen projects.

I've been mulling over ideas to make our very long blank wall less long and blank and more interesting since we moved in our house almost 2 years ago. I went through various incarnations of ideas that included murals and/or lots of artwork.

I was having trouble coming up with enough ideas for artwork that I liked. Currently I have a few pieces on there.

The photos of my critters I love (of course) and the 12.x12 "All You Need is Love" piece I made a while back I also plan on keeping around. The little quote in the frame? Eh. Not so much.

Despite the amazing amount of art supplies I own, I just couldn't think of anything to make this wall 'interesting.'

Another dilemma we have is that while we have a decent-sized kitchen, the layout is horrid. There are cabinets where the fridge should be, a door that is right next to the cabinets (so if you're trying to get something out of the cabinet - say a pot or pan - and someone is coming in from the garage, there will likely be a collision. Also, on the other side of the fridge is this very narrow area to get to the basement.

Now, there are multiple ways we can fix this problem, but the vast majority of them are expensive and require contractors. I need to find a way to make my life easier... and aesthetically pleasing.

Our large blank wall also gets smeared with fingerprints, dog drool and other things.... I needed something that would look okay if it was a little dirty, or could "hide" dirt well. Chalkboard paint?

I started with being completely and entirely in love with my little wall chalkboard I made a while back. It was handy for writing down what we were planning for dinner, but it really wasn't enough room for the two-weeks-worth of meals I plan. Usually I'd do one week and then forget the second week. :(

I also needed to be able to leave notes for Garry. We work different shifts and sometimes it's just easier to write a note for him (in big BOLD letters) to do something than it is to text him.

So the idea of painting that ENTIRE wall in chalkboard paint was born. I saw a lot of kitchens with large expanses of black chalkboard wall and to me... it's a little dark. I was thinking of green chalkboard (kind of like the ones we had in school once upon a time before SmartBoards came around), but even the green color was still a little too dark and too "green" for me.

I know! I'm *trying* to embrace color! I really am! Just give me a little credit here!

I found this photo and thought it was perfect!

Found on BHG

So that's the green I went for.

I found the recipe for chalkboard paint on Martha Stewart's website. I looked through my Glidden master deck to find a color that worked with the tones in our house and *originally* picked English Garden. However, I forgot to take my paint deck with me to Home Depot and they didn't have that particular swatch there so I had to look through ALL of the other swatches to find something close. Eventually I ended up with Behr's (). It's a little darker than the original color I picked, but I think it will look great after it's *primed* with chalk.

Okay, so now we have the chalkboard portion figured out - what about the interesting?

Other than the notes, meal plans, and other chalk-related pieces I'll have room for - I'm also planning on making (more) shelves and adding a pot rack to free-up some space in my cabinets. I'm also hoping that having them on display will encourage Garry and I to take better care of our pots.

We currently have one long shelf in the kitchen for our cookbooks and other kitchen-y stuff. I am going to cut that shelf in half and make two 3-foot shelves that will be mounted right where the chalkboard currently is. On the bottom shelf, I'm going to attach a dowel (I'm going to stain it to match the shelves) with a screw eye (is that what they're called?). The pots will hang by S-hooks. I'm also hoping to get some nice glass containers and put my tea collection on display (freeing up some space in yet another cabinet).

Because we're making an effort to repaint the wall (again) I decided to replace the floor molding as well (Auron chewed it up pretty bad when he was a puppy and frankly, I want to replace all of the painted-a-million-times molding in the house with something a little nicer.

So - with all of this Garry is going to teach me how to use the miter saw so I can start replacing all of the trim and molding as I feel ready to do it. The floor molding wasn't too expensive - about $1.50 a foot - and we have a TON of quarter round molding hanging out in the garage rafters. It was a little more expensive because it was already finished - just need to caulk the seams and the finish nail heads. Considering that we have baseboard hot water heat, we don't have a *ton* of base molding to do on the first floor.

I'm hoping to get this project finished over the weekend. It's not a terribly "intense" project, but it will take some time to complete.

Monday, July 22, 2013

Audrey, the Roomba

I wish I had something exciting to post, but everything has been pretty quiet around here lately. Garry has been working long hours, I've been working on not feeling like crap and cleaning.

We did buy a new Roomba in an effort to keep up with all of the dog/cat/people hair in the house (I would have to spend an hour vacuuming every day when I got home from work and that was NOT pleasant) and so far it has worked well.

We named her "Audrey" after the "Little Shop of Horrors" plant because it gobbled up the tumbleweeds of dog hair fairly well.

She's definitely quieter than our regular upright vacuum, but not so quiet that I could run it while I sleep. Typically I'll run it when I get home from work for the day and I can do a few other chores while it's running. She does miss a few clumps of hair here and there, but overall it's better than me having to spend the time vacuuming.

It didn't come cheap - $350 for one of these on Amazon, but we decided that with 2 cats, a labrador and two people, it was worth the cost to not have to spend the time vacuuming every day. Our upright vacuum is on it's last legs anyway - we mostly just use it for upholstery.


Overall I'm pleased with it - as it does save me the time/energy of vacuuming and keeps my floors relatively clean. Now - only if I can convince Garry that we need a Scooba (the mop version) we'd be all set!

New carpet and a dose of color

I've realized that I've been playing it too safe.

As much as I love my textured neutrals, it was just getting... boring. Sure the house felt calm and relaxing, but it didn't really feel "fun" either. I've been feeling like I'm lacking my creative edge. I love color, but I don't want to be overwhelmed by it - I'd love to see a nice balance in the house.

A while ago, Garry and I got rid of our very neutral striped shag carpet. I really loved it. I thought it was the perfect carpet for our space. Well, that is, until I realized that when you have a dog, people over, and a clumsy me and a messy husband - shag carpets aren't the best idea. So out it went.

For a while now I've been looking for a new rug. I was really in love with the woven/braided rugs and thought maybe I could make one myself. I *did* make some t-shirt yarn out of some worn past-their-prime jersey sheets we have, but considering my hands aren't what they used to be it would take close to forever to DIY a rug the size I needed (at least 5x8) so it was back to the drawing board.

As much as I love to order things online, I didn't think ordering a rug would be a good plan. The colors can sometimes be WAY off, and I didn't want to have to deal with return shipping. This left the only option of just going to stores and looking.

First off... area rugs are expensive! If you want something nicer than just a plain low-pile cheapie rug it's going to be... well, an investment. Since I wanted a woven rug, that helped on the cost a little, but it was still more than $40.

I made a stop after work on Friday to Home Goods. They always have such nice things and every time I go in I say to myself, "I could easily spend thousands of dollars in here - if given the opportunity." I completely forgot that Home Goods carries rugs and I browsed through them thinking that I wasn't going to be wowed by anything or if I did, it would be way out of my price range.

I found two rugs that I loved - one was a lime-y green and natural jute 5x7 rug. It was essentially what I was looking for, but the more I thought about it - the more color variance I wanted in my living room. I wanted a rug that I could pull multiple colors from so I kept looking.

And then I found my rug!


It was a similar design to the previous green and jute rug, but with a little more of a "tribal" style to it and about a billion more colors. While I tend to gravitate toward cool colors, this rug had a good amount of warmth to it that would look nice against our floor without it looking too "hot."

While Home Goods has a great return policy (45 days) I was very honest with them and told them that I had pets and needed to know if I laid it down, didn't like it, and brought it back (the next day) if that wouldn't work because of the pet hair. I was told that because it's a textile that I could still bring it back, but they wouldn't be able to sell it. So I had to decide if I loved it enough to take it home knowing I couldn't bring it back. (At worst case, I'd end up putting it in the sunroom or in our future master suite - I told myself).

Thankfully I loved it when I put it down (Auron was a little scared of it) and Garry loved it as well because it wasn't "girly."

This also gives me a reason to dig into my fabric bin and make some pillow covers - and to test out my Indian block stamp.

I also have the first coat of primer finished on the bottom table. I realized that with the turned legs, painting with a brush is not going to be a good plan. So - at this point I will need to sand the legs really well and get some spray primer to do the second coat. This also means I will need to find a color of spray paint I like or find a way to get custom spray paint.

Now that I'm adding more color to the room, I'm starting to re-think my color choice for the piece. Once it's completely primed, I'm going to bring it in the house and let it *live* in the space until I finish priming the hutch and hopefully I will be a little more decisive about color at that point. I still want to add the gold metallic banding in certain spots - I'm just not sure if I want to go with a bold color (like, say, peacock blue or emerald green) or something more neutral like white or grey. It's a substantial piece - and no matter what color we paint it - it will end up a substantial color in the room.

Thoughts?

Friday, July 12, 2013

Running into a snag - ahh... real-life rears it's head

It looks like our bathroom project is going to be put on hold for just a little while.

Garry's cat, Cid, has some pretty nasty gum disease and needs some dental work done. Which, as any of you with pets know, is crazy expensive.

$500 later he *should* be all set, I hope.

We still haven't heard back from the electrician to finish all of the work up there, so that's kind of a bummer. We should still be able to get that much of it all done before the end of summer. However, I don't think the drywall is going to happen if we decide to route the plumbing first. (Maybe there's a way to drywall the rest of the room except for where the plumbing is going?)

Oh well, we're not in a huge hurry to get the room up and running. I'd like to be able to move us up there by the end of the year (bathroom doesn't have to be finished though) and it's likely we'll still be working on some projects up there too - like the his and hers closet built-ins.

Flooring is another kind of expensive issue that we'll need to tackle. We're planning on carpeting to add as a sound barrier.

We still haven't actually *finished* the arbor either. Part of the problem lies in that Garry works second shift and I have terrible balance. It's basically up to him to help me finish painting it. I'm hoping that maybe sometime soon I can get it finished so I can plant the rose bushes I want either next spring or this fall - along with plotting out the rest of our front garden.

Speaking of - a few of my gladiolus have bloomed! :D They are orange (not my favorite color) but they are still really pretty. I realized that I planted them... awkwardly. I really think next year I need a better plan than just "Let's just put them in the ground." Generally that's what happens.


Thursday, July 11, 2013

Kitchen plans

It's been a little while since we've done anything in the kitchen.

Actually - I have a Rustoleum cabinet transformation kit in pure white just WAITING to be used, but until I either have a: time, and b: help, I won't be able to get around to it. I also have a bunch of half-started projects that need to be addressed before starting a huge undertaking like painting cabinets.

But - painting has been on my mind - more in the way of the long, boring wall in my dining area. I've had a hard time figuring out artwork (I do have a few pieces up) and even though we have a tiny little chalkboard wall area, I'd like it to be bigger.

So - I'm thinking of painting that ENTIRE wall in chalkboard paint.

Thankfully chalkboard paint doesn't have to be black.

Leave it to Martha to come up with a recipe to make something creative...

Chalkboard paint recipe

I'm thinking of doing something like this:

Find the original picture here

Okay, without the barn door pantry (as awesome as that would be), because we don't have enough space to do that in the wall (the staircases to the attic/basement are behind that). 

I also want to move my current shelves and add some more to make a pot rack and a place for my tea collection. 

I'm also hoping when we *do* get around to painting the cabinets that we can take the doors off of the uppers to brighten the space up. Worst case is that we don't like it an put the doors back on... easy peasy. :)

Tuesday, June 25, 2013

What's new in the garden

It is still fairly obvious that I'm an amateur gardener. Most gardeners would remember what plants they planted - or if they planted a lot - would hold onto the seed packets so they could say "Oh, yes, I planted *that* there." No suck luck for me. 

Anyway, the bearded iris are finished flowering for the season and are hopefully gearing up for a fall show. While I was worried that I'd end up with a garden bed full of shriveled up spring plants - the annuals Garry and I planted started flowering. 


For the life of me, I can't remember what these are. Garry picked them out because he LOVES blue flowers, almost as much as I do. 


Anyone else want to take a stab at it? It's silly, I should know what they are. But, they are really cute little flowers and I'm enjoying them as I walk in the door every day. 

There are still a few rogue hosta lurking in my garden bed. Luckily they're in a spot where I don't really mind them being - so they can live... for now. 


The light purple trumpeted flowers are pretty and so long as they don't get out of control (the bed was full of them and a host of other plants that we didn't care for when we bought the house) I'm okay with a few standing their ground. 


They almost are overpowered by the foliage from the bearded iris (seriously, those things are huge!) so they might get transplanted to somewhere else where they can be appreciated in the fall. 

I was really worried that the Alyssum I planted wasn't going to flower, or be incredibly spotty.


Doesn't look like I have to worry too much about that! :) 

I'm still learning a lot about planting annuals. This was our first go at it and we did.... okay. The annuals we planted in the planter bed (the ones pictured) grew and bloomed. The ones we planted in elsewhere didn't make it. :-/ I'm going to try starting seedlings inside over the winter and then planting them. The biggest problem is where to put them where they will get enough light. 

I am having a lot of success with my bulbs and shrubs this year. 


This is my white Rose of Sharon shrub and my gladioli planted around it. They are HUGE! I'm hoping the glads will be able to lean against the shrub for support, but I think I will eventually have to stake them as we get closer to their blooming season (which for both plants is not that far away!). 

Each year we add a little more to the garden. There's not so much to do this summer except tearing out the myrtle growing on the small side yard, tackle the dreaded back corner in the backyard, and *hopefully* plant my rose bushes next to my arbor. 

This fall I'm hoping to divide my bearded iris along with planting another variety in the planter bed. (The divided ones I'm going to move up near the arbor) Since I have to dig up the gladioli bulbs anyway - I'm going to apply a strategy for plants to bloom all spring/summer and dig up all of my bulbs and replant the hardy ones along with some new ones. There may or may not be charts involved.... where's my graph paper!

Shutters, tables, and quest for the master bath

Yes, it's been a while. Maybe I'm not so great at this blogging stuff. My little tablet at home for some reason can't handle what I need it to do and Garry is usually playing around on the desktop - so... that equals little time to write out all my thoughts and photos.

I finished the shutter project (finally!). It was probably one of the easier projects I've done in a while - just spray some clear coat, screw in a few hinges and Ta-Da!


Looks pretty nice! But, it does look a lot better in person. :)

I'm wondering what else needs to be in that corner. I'm thinking a white/tan floor vase. I have *tons* of filler that needs to find a home... soon.

I'm also considering buying this guy. I think he would look lovely behind my couch - and thankfully it's the right length/height. It would be nice to have a little more surface/storage space. I would love to have a basket under the sofa that had some craft stuff (like my embroidery and drawing) so when I'm having a not-so-great day when there's little else to do except something with my hands and watch tv, well, I have something right there. Most of those items are packed away somewhere in my craft room (which is still a pretty crazy, unorganized mess) and I honestly don't want to search through all my drawers and containers to find whatever little project I want to work on. Once one is finished, I can put a different project in there to work on. I'm hoping Garry will agree that this is a good idea.

Our flea market find table/hutch is coming along. I managed to get a coat of primer on the top part of the table/desk. I also scrubbed two of the legs down.


I read on the primer that the paint didn't need to be stripped in order for it to work, so since the current paint on the legs is in relatively good shape, I'm going to just clean it well and prime over it and see what happens. Once I get the first coat of primer finished on the whole piece, I'm going to sand it lightly and add another coat and then (you guessed it) sand lightly again. I don't want to take any chances that the bright yellow will bleed through.


BTW, the primer I'm using is Zinsser. It's oil-based and hopefully will be more durable than a water-based primer would be.


So far, I'd have to say I'm really liking this primer. It went on relatively smooth for a first coat and seems rather durable. The pictures above are with only one coat. Even though it *looks* completely white, the primer is uneven and you can still see some of the yellow through it.

Why yes, I *did* scrape a bunch of the old paint with a stripping solvent. Guess what? It stained the wood yellow because the person who painted this didn't prime it first. Oh well. I was going to have to prime it anyway...

As far as paint color for the final coats go - I'm thinking of painting the body grey with some white, gold, and soft aqua/turquoise accents. There are so many curves and details on this piece and I'd like to use some different colors to highlight them. The previous owner apparently felt that way too, only decided to use neon orange and bright green... on top of yellow. Luckily we have some tiny brushes and painter's tape I can use for this process.

That process will take quite some time and I'm more than likely going to do it after I bring it in the house.

As far as the seemingly never-ending project that is the master suite...

We're still working on getting the walls for the master bath ready.


I'm not sure yet what I want to do with this wall. I'd love something with texture and fun. I'm also thinking of making it a gallery wall.


The wall extends out a little further than I originally planned in order to have a regular door. We contemplated having bi-fold doors as the door to the bathroom from the bedroom area, but decided regular doors would be better. It also creates a little nook area (once we get the staircase walled in with a half-wall) where we can either do a built-in dresser, or do something else for storage.


I also want some long-ish pendant lighting to hang over the stairwell. I'd *love* to have Moroccan lanterns.

We do have a *slight* problem that we're running into. The heating element runs along the entire back wall of our attic. In order to build the wall separating the bedroom area from the bathroom, we need to cut the element and create two separate units. Easy enough to do - for someone who works in the industry that is.

So - in order to get the electric finished, we're going to build *most* of that wall - save for the last stud and anchor - so the electrician can finish his job. When the plumber comes in and does all of the rough-in, we'll have him cut the element so we can finish the last section of the wall.

And then.... there will be drywall.

I'm seriously thinking of hiring someone to take care of the drywall. Garry is working a lot this summer and I think it would be nice to just have someone come in and do it and have it done in a few days - rather than have the stress of doing it a little at a time and doing it right. Sure, it will probably cost more, but I think at the end of the day, we'll be happier than if we decided to do it ourselves.

Ideally, I'd like the master suite to feel like I'm staying in some bohemian hotel away from the world. There's not a whole lot of light (yet) and I'd like to keep the color palette light as I have a hard time relaxing with a lot of vibrant colors around me.

Also, there needs to be a place for Auron. I'd like a spot upstairs where he can have his den and it doesn't look just "thrown" in the room. I want him to feel comfortable too!

Friday, June 7, 2013

More garden pictures

We don't have much going on right now - still working on a bunch of my projects, Garry started his summer job, and - that's really about it. We're just plugging away.

I'm sure you're happy to know that my fuchsia hanging basket is still alive and it looks gorgeous. The little flowers on the end look like little candies and I just love them. I'm hoping it will bloom all summer long. 


My bearded iris finally started blooming as well. Both plants are HUGE and more than likely will need to be divided this year. I have two varieties:


"Mother Earth"


And honestly, I can't remember what variety this is, if anyone could enlighten me that would be great.


Here they are, peacefully coexisting together. They are gorgeous plants. I'd love to get another variety because we have a big space in the middle of the planter that just needs... something. 


My dwarf iris is chugging right along. These are the ones I rescued from my back yard. I don't know what variety these are, but I believe they are "Cinnamon Stick." That's my best guess.


I really do get the best photos of my Japanese maple. If you look through the leaves on a sunny day, it looks like the tree is on fire. It's just gorgeous. The seeds are really colorful as well. 


I have no idea what kind of flower this is, but it's growing in my back yard. Anyone? Bueller? 

Speaking of the back yard, Auron has had a good time running around like it's a doggy race-track. 


This is mid-loop


Okay, we can stop just for a second so mommy can take a picture. 


He's my sweet 85 lb. moose-baby. He thinks he's the same size as the cats and tries to crawl all over us just like them. He's 16 months old and is still very puppy-like, but he has moments of showing the "wisdom beyond years" - usually it's when I let him outside and he runs to the edge of the slope of our back yard and he sits and stares off into the distance. There's nothing there, no sounds, but he just "takes it in."

Wednesday, May 29, 2013

And onto the next project

We had a bit of a surprise yesterday - apparently we overpaid our Escrow account by $1,600 this last year so we got a nice, fat, rebate check. Of course, we were super excited! On top of that, our monthly payment is going down by about $75.

In light of this, we've decided to hire someone to finish the electric in the attic. That way it's DONE and we're one step closer to getting our master suite to a livable state.

Once the electric is set we can start building the frame for the bathroom and around the stairwell. I'm hoping our miter saw will come in handy here!

Little steps at a time... This master suite is going to be awesome! In case you were wondering what needs to be done:

  • Electric finished and re-inspected
  • Frames for bathroom walls and stairwell built
  • Plumbing routed for bathroom fixtures
  • Windows replaced 
  • Drywall all the things
  • Install overhead lights
  • Build built-in wardrobes
  • Paint... there will be so much painting...
  • Install flooring 
  • Install bath fixtures
  • Furnish/decorate

It's a pretty long list and I am fairly certain it will take at least another year to accomplish. This year alone, we'll end up spending close to $4,000 (but probably more) getting the construction portion of everything taken care of. I think installing all of the pretty elements will end up waiting until next year.

However.... my 30th birthday is coming up in August and the coolest present would be to paint the bedroom. I found an awesome tutorial on how to paint clouds on the wall - click here. How awesome would that look?

When we moved to NY my mom painted my bedroom with clouds. It looked so awesome. It was the best bedroom ever. I have some pretty awesome ideas for this room, but it will take a few years before it completely comes to fruition.


Monday, May 27, 2013

More arbor work, short garden tour and shutters!

This afternoon the weather was in our favor and Garry and I tackled the arbor project. Last time I posted we had 4 posts in the ground with a coat of stain/sealant on it. After a few hours of work, we managed to complete the rest of the "building phase" aside from the trellis on the side, which I am still undecided about as far as design.
We still have some more sealing to do, and I think I'm going to end up painting everything after it's sealed. But, for now I'm quite happy with a beautifully gorgeous arbor.


Just think how nice it will be once we have some climbing roses... clematis... or some other beautiful flowering vine.


From the front side... now just imagine a little stone path from the sidewalk to the walkway...

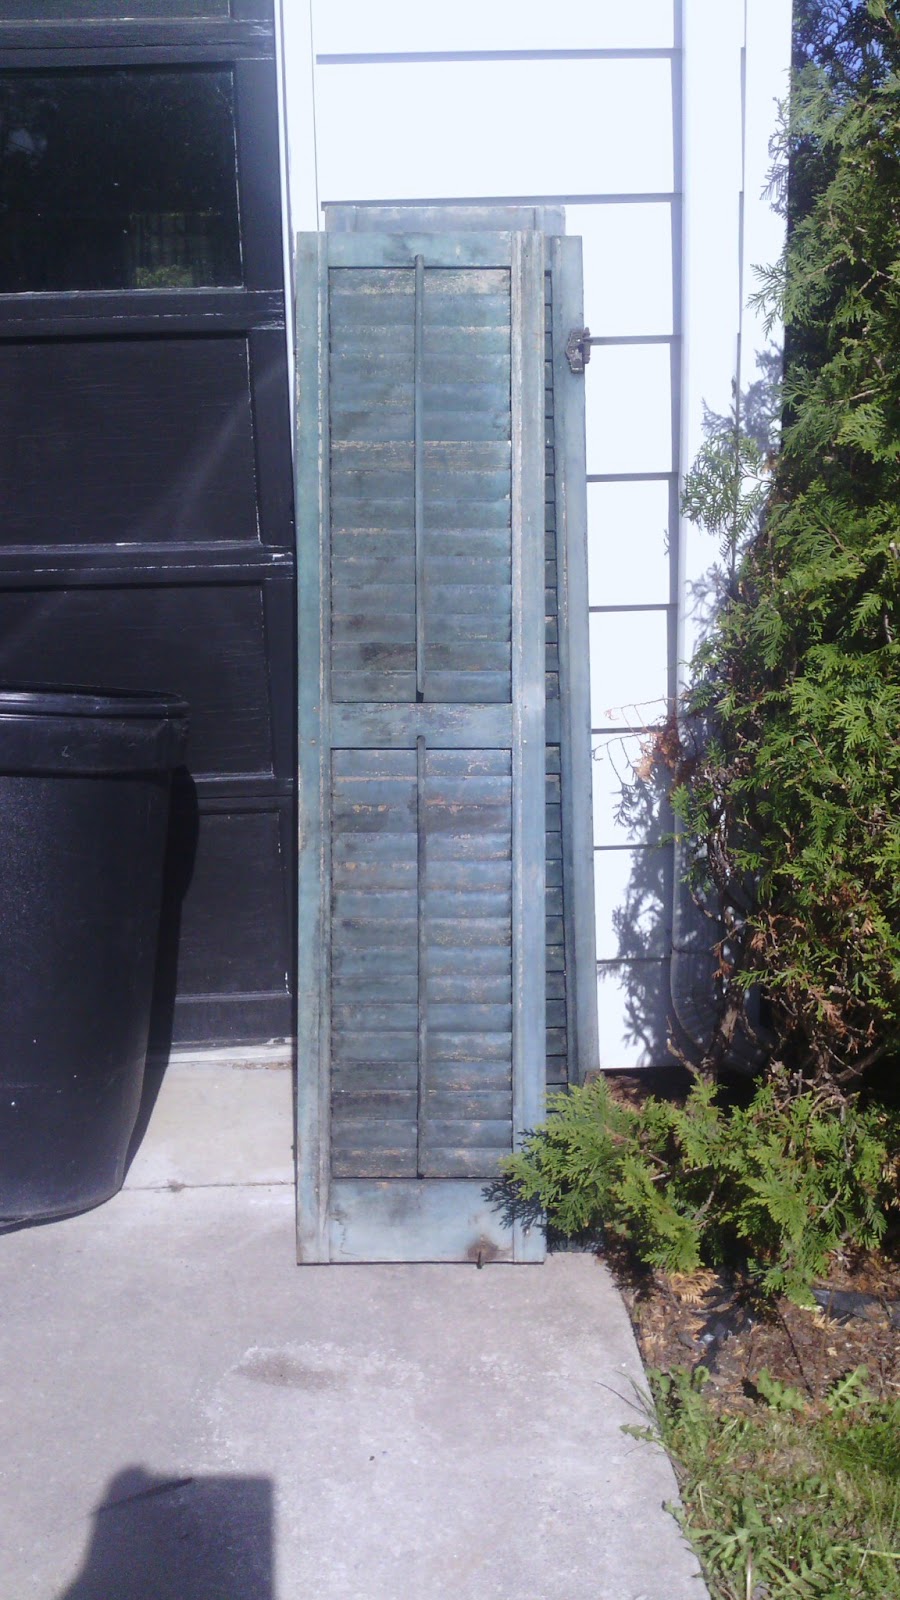
Garry also picked up the shutters for me that I've been thinking about ever since last year's flea market trip. I figured since I had been not-so-secretly lusting after them for a year, I should probably get them. It seems weird that I'd be daydreaming about a bunch of beat-up old shutters, but they will make for an interesting decorative element in my living room.


This was after a quick rinse of from the hose. They aren't dirty - that is just the paint chipping off of them. I bought some hinges from HD and some matte finish clear spray to coat everything. The chances that the paint on these have lead in them is high - not to mention I don't want to lose more paint on them.

I am still debating whether or not I want to paint a design or something really simple on them. I think I will do the clear spray first, put it together, and then make a decision. Once it's in the room I think I will know whether or not to leave it as-is or try something new. This whole project cost $50 - much cheaper than trying to build my own or to buy anything new. Yay flea market!

And... lastly, my garden is doing fairly well considering the major flux in temperature over the last week. My tiny rhododendron is blooming...


The gladioli are growing nice and tall along with my rose of Sharon. They will all bloom at the same time which will be SO gorgeous... I can't wait until summer!


BTW... taking photos with a tablet is a lot harder than I expected. So some of these might be... a bit off. 

I love how the light shines through the leaves of my Japanese maples. (I believe they are the bloodgood variety) 


If any of my local friends want Japanese maple seeds... I have a ton. I always end up pulling up a ton of rogue seedlings in my yard and planter every year. As much as I love these trees, I just don't have room for more than two in my front yard.

Oh - and I noticed that the little iris I transplanted earlier this fall had started blooming under the smaller of my two Japanese maples... 


At least, I think it's a dwarf iris. Although I've never seen red/yellow ones before. This same variety bloomed in my backyard last year. I had to move them because they were seriously over crowding with the hosta - and they were invading into our dog's yard (and unfortunately we have a bad combination of a very curious dog and poisonous plants) so I moved them to the front yard where they would be (for the most part) left alone. 

Speaking of iris... my bearded varieties are growing like CRAZY this year! Last year was their first year and I had two plants produce one bloom (that lasted only a day). This year we have multiple stalks of blooms that have yet to blossom, but I think it will bloom soon since it seems like all the other iris in the area have already bloomed... I guess mine are just late bloomers. But that doesn't mean they aren't as beautiful or worthy as other iris, they are just taking longer to mature - and that's okay. :) 


I know the purple/yellow variety pictured is the "Mother Earth" variety... I'm not sure what the other was called, I just know that it's a rust orange and yellow color. I bought it because it reminded me of Garry's hair. 

We also (finally) hung our hanging fuchsia basket and I gave it a nice, new basket with cocoa lining along with a good watering with fertilizer. I'm hoping it will be a much happier plant. I know I will be happier being able to see it from my kitchen window. Sorry folks, no photo yet... I was DONE using the tablet by this point. 

And now... off to finish my martini and think about making dinner. 

Friday, May 24, 2013

Front arbor project

Between the crazy hot and cold and wet (in the same week!) weather and a nearly solid granite front yard, the front arbor project has taken a little longer than expected. I always love when Garry says "Oh, sure - I can do that in an afternoon/few/hours/weekend" and then it ends up taking... oh... 2 months.

Right now we have the four posts in the ground and a coat of stain/sealant on them.


The other two posts are stained/sealed... I just took this the morning before Garry did them.

You don't notice it too much, but the ground is REALLY uneven around the posts and slopes in two directions. While it's not a big deal for walking, trying to be up on a ladder to stain the tops of the posts was not an easy task... and I have terrible balance.

We still need to move all of the dirt/rocks out of the yard and build the rest of the arbor as well as give it all another coat of stain/sealant. While it seems like the white color we chose is a little redundant, eventually we'll be painting the house another color, so the white will really stand out - especially with some light-salmon colored David Austen climbing roses winding around them.

And yes, our lawn desperately needs a good weed and feed. It's safe to say we have more things other than grass growing than actual grass. Once I get more of the landscaping done that I plan to do, it will reduce the amount of actual "lawn" we have - not by a lot, but it will help make it more manageable. Adding edging with paver stones will also help. But, our lawn is in pretty bad shape.

This weekend it's supposed to be considerably colder compared to the beginning of this week - so the plan is to start working on the hutch (as described in my last post). I think tonight I will do a test area to find out how long I'll need to leave the stripping agent on the piece (so if I have to leave it on overnight I can apply it and then scrape it off tomorrow).

I'm giving myself a small goal of just getting the bottom piece stripped and cleaned over the long weekend. This is going to be a summer-long project I'm sure. There are so many little details that it will take a while to get all of it. I also want to do it correctly - so that ultimately means really taking my time since I'm a novice (at best) at refinishing furniture.

But, back to the arbor... I'm hoping Garry can get some more work done on it this weekend. Ideally, I'd like to have it *finished* this weekend, but we have a fairly busy schedule as-is so I'm not holding my breath.

Monday, May 20, 2013

Flea Market Find

Every once in a while Garry and I like to take a trip to the local flea market. Sometimes we go with the hope of finding something particular (like this last weekend) or just to see the sights.

We recently rearranged our living room so the television now sits on our teak stand. The spot where the tv stand was seemed rather empty, and when we moved a small stand in that space, I realized that we needed something bigger.

I thought a bookcase (or bookcase-sized) piece would be perfect. Something kind of tall, sort of wide, but I had no *clear* definition on what that had to be.

We walked around, found a few bookcases, but nothing that had much personality. If I'm going to put the time and effort into refinishing a piece, I wanted it to be special. Otherwise I'd just buy something already finished.

Then I found this...

It called... well... okay... it shouted to me "Please save me from this neon hell!"

The top is upside down in the photo.

This is an incredibly unique piece made of mostly solid wood (the backing isn't) and luckily whoever painted it these hellish colors didn't paint the inside of the drawers as well.


Of course, this is one of those moments where I don't believe in coincidence. I was meant to have this piece. You can tell just by the smell that it had been sitting in someone's basement/barn/garage for just about forever. The scratches, scrapes and paint splatters indicate that it hasn't be loved in quite some time.

Since there are a few missing pulls, I'll be replacing them with ones from Anthropologie. They have some gorgeous vintage-style pulls and knobs that will go well with this piece.

After reading about various ways to strip paint - I decided to go give Citristrip a try. Because there are so many nooks and crannies, I bought some small wire brushes to get the paint off as well as a plastic scraper.

I'm not sure what color(s) this piece will end up, but I know the flowers will be painted white (big surprise). Since my living room is mostly neutral colors, I'm thinking that might be the best way to go (possibly a medium warm grey color, with white - there might also be some small touches of teal or blue as well) but only time will tell. It will take a while to get all of the paint stripped off, the hinges cleaned and any other repairs that need to be made. I think drawer liners will also happen.

This piece deserves all the love it can get. I'm looking forward to the process.

Tuesday, May 14, 2013

Things that I like...

Some of you know that I've been seeing a therapist for the last 6 months. It's been interesting - she's been very helpful - sometimes just having someone to talk to that is completely disconnected from the rest of your life is nice. It's like you can tell your story to someone without them having impressions or biases on the characters. I can also express how I really feel about something... which I'll be honest, is something I'm shyer about than most would think. She also is reassuring and even encouraging on this crazy notion I have that I should just be who I am instead of... well... whatever it is that I am.

Trouble is, I'm not really sure *what* that is. Not to mention, that I have an overwhelming fear that I am boring.

When I told her this in my session today she just looked at me like I was speaking a foreign language she didn't understand. Of course I said it as I brushed the newly-dyed turquoise hair out of my eyes.

So my "homework" for this week is to make some headway on who I am, what I like to do, and what I'd like to accomplish. This is something that Garry has brought up with me numerous times, but the thought of "well I can't do that because my fibro/time/money/whatever" was an obstacle to overcome. My therapist said to essentially forget all of that (fibro/money/time/whatever) and just come up with a list.

I *am* turning 30 this year afterall, I should have *some* semblance of who I want to be by now.

The funny thing is - if I ask 10 different people I know to give me a list of 10 things they think I'd enjoy, I'd probably get a list of 100 unique activities. I'm not sure if that's a good thing, or what. So, I'll be working on this list this week, maybe some cleaning because the house... well it's pretty dirty at the moment and I'd like to see how well the floor polish I bought can stand up to labradors.


Tuesday, May 7, 2013

A quick bathroom refresh

A few weeks ago I decided (for whatever reason) that I needed to go to Target. Usually when I'm feeling like I need to pick up something for the house I go to Christmas Tree Shoppe, but after multiple trips to the store over the last few months just to browse, I needed a change - not to mention there were some new collections at Target I wanted to check out and a few odds and ends I definitely wanted to grab while I was there.

Thankfully the damage wasn't nearly as bad I it could have been. 

The problem with going to stores like Target, is that I could spend a good chunk of cash in multiple departments. Given the opportunity - I'm sure I could easily spend $1,000 there in an afternoon. 

But thankfully I didn't. 

Aside from a few little things like plant food, my focus oddly ended up on freshening up the bathroom. I found some really cute hand towels and washcloths on sale and it kind of went from there. 

I really loved the green glass soap pump and toothbrush holder - our previous ones were brushed nickel and didn't stand out as much. The room was looking a little "blah" and the dose of color was definitely welcome!
Some water hyacinth grass baskets from Christmas Tree Shoppe (okay, so I did stop by there) helped corral the overwhelming amount of hair products/lotions/stuff stacked on the shelves. 

I used some items we already had around the house to decorate the shelves. The large conch shell is from my grandfather (not sure where he got it... but it's older than me) and the little glass bottles I had hiding in a box. 

This bathroom is almost impossible to photograph because it's so narrow... but you get the gist of it.

I'm thinking of painting the frame around the mirror (there's a leaf pattern carved into it) either silver or green, but I'm not entirely sure which yet. I have (2) gift certificates for a free test tin of paint from Lowes (yay! Family Circle mag), so I think it will largely depend on what they have available. 

At some point this summer, the sink and cabinet will be replaced by a simple pedestal sink after the plumbing construction is done for our master bath. Since this bathroom won't be our primary bath (and because it is fairly small and narrow) a pedestal sink will look really nice. Once we get our master suite completed (which will be quite some time) we'll look to redoing the floor and installing a new bath and surround.

But for now, a little updating is a good thing - especially if it helps corral the bathroom clutter.