Tuesday, August 21, 2012

One year

It truly is amazing what you can accomplish in just one year. As of August 6, Garry and I have been living in our house for a whole year. Considering that I moved from apartment to apartment every year (I've moved over 10 times since graduating from college 8 years ago) being in one space with no thought of going anywhere else was a bit... odd, but liberating at the same time.

I've decided to try and re-take photos we took of our house when we were first looking at it last year to show what we have accomplished and what we still have yet to do. Bear in mind - some of these photos are going to be of messy, chaotic rooms that haven't been really touched, rooms still in progress, and rooms that are almost there. Some of the photos haven't been taken yet (as there is much cleaning that needs to be done in our house before I can take those photos) so please check back for more updates!

By no means are we "done" with any space or project in our house. We've learned that's it's an evolving process and as we go along, we learn more about ourselves and what fits "us." We've also learned how to create a space that is comfortable for others and not just ourselves. That has been a wild ride to say the least, but at the end of the day, it makes us value our home even more.

So let's start with outside...
Before
Progress. We had the large pine tree cut down and took out a few shrubs in front of the picture window.

More progress. After all the shrubs are taken out and new plants are planted, you can definitely see more of the house. While the plants are still relatively small, they will mature and make the front area look a lot fuller. We made the front planting area even with the stone retaining wall/planter to the right. You can still see a bit where the old pine tree was in the middle of our yard, we're still working on getting the front lawn looking how we want it to.

Before


Despite needing a trim, we took out the shrubs that were dying and planted some rose of sharon on either side of the shrubs and extended the planting area. The rose of sharon will eventually grow to close to the gutters. We'll have to keep a vigilant eye on it starting next season, as you can see the one pictured above is slowly creeping taller than the shrubs.


Pretty flowers...

Before


We opened up this area by taking out the iron divider, and added the blue wicker bench and potted mums. Once we put new plants in the front planter it will act as a short, natural "wall" between the sitting area and the garden.

Going inside - here's the living room and entryway:

Before

Bonus! :) We decided we needed something to sort our mail, hang our keys, dog leash and work ID bages. Also, I had three photos from our wedding printed and hung to give us something to smile about on our way out and in.

Before 

Progress. We purchased our sectional couch and ottoman the day we closed on our house and wanted to paint before it arrived. We also hung the shelves and put a few special items on it (a photo of the two of us, a green owl-shaped lantern and our gold ampresand) to make that corner a little more personal. The window coverings and pillows were all made within a month of moving in (before our wedding). We added a simple, cheap green rug to go with the green in the curtains and pillows.

More progress. Finally we had an overhead light installed (through the grant program we participated in), a new coat of paint (the blue was too bright and a little girlie for us), large prints were made of the carousel I took photos of, and a few more personal items added to the shelves (a white ceramic flying pig, a paper apple and a wire tree sculpture that was a wedding gift from a friend of ours) to give it depth.

Much closer. More throw pillows added to the couch, the beginning of a sculpture under the shelves to add texture to that corner of the wall and a catch-all bowl and serving tray sit on top of  the ottoman. We also purchased a shag area rug to add more texture to the space. Now we just need some more "solid" curtains crown molding, and to finish the sculpture. This is probably the most "complete" space in the house.

Before - Crazy wall-o-mirrors.

Progress...? Those things needed to come down. I know some folks are really on the mirrored wall thing, but honestly, an ENTIRE wall of them?! NO freaking way! It basically meant an entire wall of not being able to put anything on, which bugged me. That and it made the room feel "sharp," which I didn't like. 

Progress??????? After a few failed attempts (no photos included out of sheer embarrassment) at fixing the mirror wall, we finally begrudgingly decided to install wall panelling on the accent wall. A few of Garry's friends helped with the install.


Progress. You know, I really wasn't too excited about the idea of wood panelling. I even bought paint so I could just "paint over it" because I thought it would be horrid. However, once it was up, I really liked it. The color of the panelling went well with the room and it meant that I was D-O-N-E with that part of the project.

Next up is the kitchen:

Before

Progress. We redid the entire countertop and backsplash of the kitchen, replaced the sink and faucet, and had a dishwasher installed. Unfortunately, Garry wouldn't let me paint the cabinets. :( 

Progress. Painting the walls a lighter color seemed to allow more light to bounce around the room. We also took down the curtains (and are in the process of making new ones). This area is still very much "in progress" as we still have to sort out some storage solutions, pretty-up the window area, and possibly create some open shelving to lighten the room. I'm also toying with the idea of repainting the room and possibly finding a way to refinish the cabinets in a lighter color (that doesn't involve paint because apparently that is not allowed). We also need to install some track lighting.
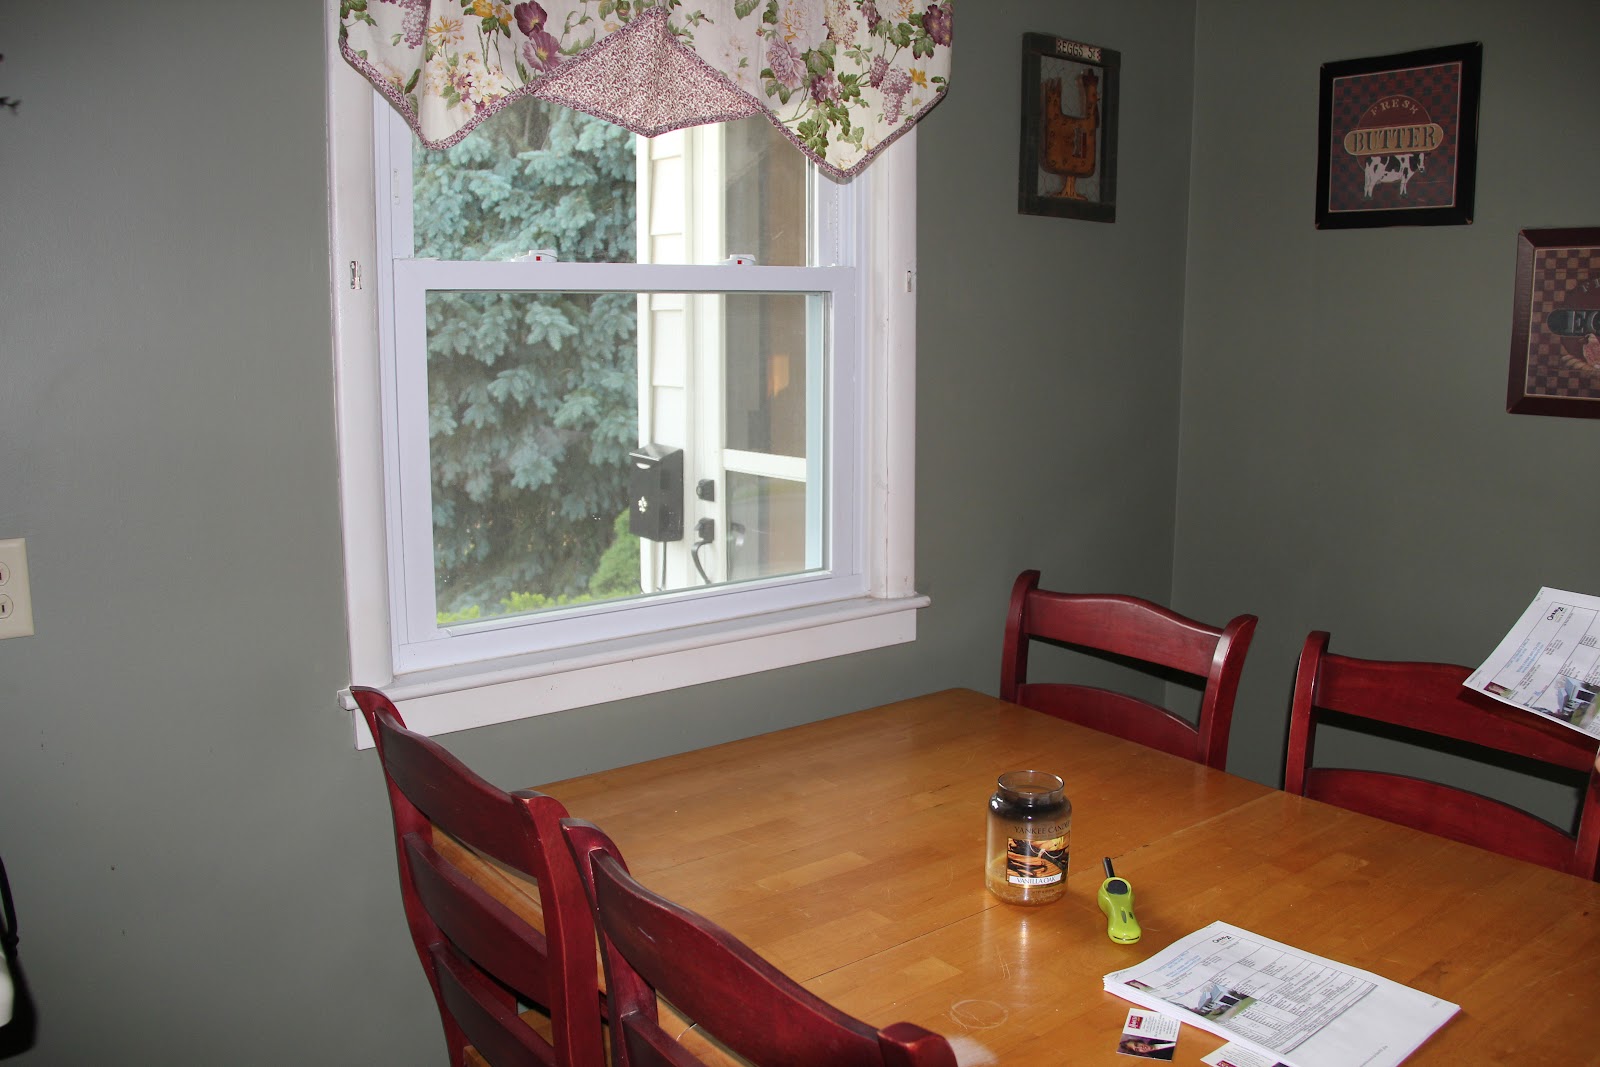
Before

Before

Progress. New tile backsplash, counter top, sink and faucet really helped out this area. Oh, and coffee... coffee always helps.

Bonus! :) We had a very long wall that had nothing on it, so we used an old, odd-sized frame we had, painted it white, spray-painted some left-over chalkboard paint I had (from another project a while ago) and created a menu chalkboard for our kitchen (and yes, we still eat Ramen noodles).

From the kitchen, we make our way into the backyard: 

Before. Most of the backyard was left to it's own deisgns... meaning lots of very invasive ivy growing into the foundation.

Progress. Garry being a manly-man and ripping out the ivy and other shrubbery. The Japanese maple seedling was moved to the front yard.

Progress. YAY! No more ivy! Eventually, this may end up becoming a garden bed of some sort, or a play-area for kids.

 Before 

Progress 

Before 

Progress

Before 
Bonus project: We added a small firepit in the middle of the yard. We're also planning on chopping up the wood along the fence line and stacking it somewhere out of the way. The metal clothes line pole will come down this season too. We have big plans to make a little garden area in that back corner where the fence is.

Something like this would be really lovely (found on google images) but with an all blue/white garden.

Okay, back inside... now here's the master bedroom:

 Before

 Progress? We moved the curtains from the living room into the master bedroom when we repainted the living room. We picked a mid-tone bright blue that, in all honesty, is a bit "much" for us. Plans are to repaint the room.

 Progress. I found a few copper-colored metal stars at Jo-Ann's that I love on our wall behind the tall dresser. I'm planning on refinishing the dressers at some point this year.

Progress. Plans are to refinish this dresser, add a new mirror and find some artwork for this wall. Plans also include possibly building a new jewelry holder out of "found" items and moving Auron's crate (to somewhere it makes sense). My husband also found a type-setter's drawer for me that we're going to install somewhere in this room.

 Before 
We haven't done much with the closet except take out the lower bar to make room for some of our longer items. Eventually, the plan is to create a more organized closet.

Here's the incredibly girlie guest room:

 Before 

 Before 
As of right now, we haven't done much to the room other than paint it a slate blue color and put up shelves. Since friends of ours are living in the room now, we didn't photograph it for the sake of their privacy.

The very-much-a-selling-point sunroom (right off of the guest room):
 Before 
The only difference to this room is the installation of 2 sconce lights on the wall shared with the spare bedroom. Again, since our friends are using this room currently, we didn't photograph it for the sake of their privacy.

First floor bath (okay, the only bathroom in the house... as of now):

 Before 

 Before 

Progress. Well, more like "done" as there really isn't much else left to do. The diverter from the faucet to the showerhead was corroded beyond all belief and we ended up having to replace the hardware in the tub. In the process, we had to retile the bottom part of the tub. Instead of trying to find tile to match (which this tile was kind of old and a specific color) we went with something that "went" and are planning on playing off that color scheme.

The attic (or soon-to-be guest room or master suite):

Before

Progress 

Progress. Right now we're in the process of installing the electric boxes in the walls. Once they are installed and inspected (can't be too safe!) we will begin the sheetrock adventure. After sheetrock comes new windows, some paint, flooring, trim and (finally) decorating. I think it's going to take quite some time to get this project done.

Realistically, this is the closest to our room design that I've found on the interwebs (from bhg.com) I really love the idea of bookshelves around the landing - but otherwise our room will be a little more colorful.

I really like something like this (taken from Pottery Barn website). There is texture, color (even though it's still fairly muted) and I can find a lot of the accoutrements for fairly cheap. The space will ultimately be a guest room, so it has to be "comfortable" for a variety of guests. In otherwords, it shouldn't be "too" crazy that it doesn't allow someone a good night sleep.

Overall, we've done a lot of work getting this house from where it was when we purchased it, to where we want it to be in a few years. Sometimes, something has to look a whole lot worse before it can start looking a whole lot better and that is certainly the case with a lot of these rooms. We understand that these kind of things take time and it can take 5 years or more to really feel "settled" into a house. 

Even though we haven't been able to finish all of our started projects or even get to some of them, our house still very much feels like a home. While paint colors, fabric, tile and all of those things are wonderful and can have a huge affect on you and your home, what makes a house a home is the love you put into it. 

Monday, August 20, 2012

Bathroom paint - and why I hate vanity lights

This Sunday I was determined to finish the bathroom. It had been a few weeks since I painted the beadboard and frankly, I was getting tired of all my bathroom stuff hanging out in my living room, impeding on me taking lovely photos of my house for our 1-year anniversary in the house post.

Of course, having 4 people, 2 dogs and 5 cats doesn't help either. I'm starting to understand why my mother would get so crazy over just having one room in the entire house stay clean.

Anyway...

So I finished painting the bathroom, finally. One of the biggest problems was that in order to paint near where the light fixture was, the fixture needed to be taken out. Let's just say the fixture wanted to be.... difficult. Let's also just say that I might have had a few choice words (growled just above my breath) for said  light fixture. Eventually the light fixture came down and I was able to continue painting. Unfortunately now we have to replace the light fixture because... well... it's a jerk and is broken.

One thing that doesn't make sense to me (and this happens every time I paint a room) is why on Earth people do some of the dumb things they do when building a house. For instance, in our house we have tons of doors and windows that are so close to the corner that the casing had to be trimmed length-wise to fit. The annoying part of that is that there was PLENTY of room to build the door frame a few inches over so you didn't have to put the casing in weird and make more work for yourself. I just don't get it. Just move the door over another inch. Why is that hard?!

I also think that there might actually be a pipe fixture (or something of that nature) already in the spot where we want to move our toilet. Standing in that area I can feel the outline of a circle with my feet. Hm, it might not be as difficult of a switch as we originally thought. However, I'm fairly certain we're going to have to redo the subfloor in there because there are places where I feel that it's warped. Boo! Not fun! It's about a million times worse because it's our ONLY bathroom in the entire house.

So getting back to the paint...

It looks really nice and clean. I am loving that the color looks more like sea glass in this room than it does in the kitchen. I'm seriously considering repainting the kitchen... it just doesn't feel... right. I don't know what I'm going to do yet, but it needs to "flow" and I'm not allowed to paint the cabinets. *grumble*

Monday, August 6, 2012

Paint, paint, light!

Over the weekend we managed to tackle a few projects. For one reason or another, I really feel like accomplishing something - which is really saying something because most of the time, I just daydream about getting things done.

The first project on my to-do list was to repaint the white wicker loveseat that my parents brought up from Florida last year. 

I forgot to take before photos, but here are a few of the process: 


Still kind of splotchy - time for coat number two!

Much better!

It was about a billion degrees outside on Saturday - why I thought it was a good idea to work outside, I have no idea. Normally those are the kinds of days where I hide in the house and fall asleep on the couch watching Lord of the Rings or something like that. Wait, that's almost every weekend...

I also wanted to spruce up our front porch with some flowers. I had a gold 3-pot planter hiding in the sunroom that I've been wanting to use for quite some time. I ran out of paint at one point so off to Lowes I went and they had white mums for sale for $5. So I picked up three. 


Now you may want to know why on earth I cocked them weird. Well, see, I had these three terra cotta pots  in my garage and unfortunately I forgot to measure to see if they would even fit in my planter before going to Lowes. Yeah, I know, dumb. But, I actually like them cocked like that. You can see more of the flowers this way and, I don't know, it just looks different. It's better than having random camp chairs on my patio! At least give me that!

My Uncommon Slice of Suburbia


Adorned From Above
All we need now is to:
  • find two little side tables to put on either side of the loveseat
  • vacuum off the loveseat cushion and bring it outside
  • take out the metal decorative thing
  • replace the outdoor light
  • replace the front door 
  • fix the concrete slab
  • find a nice hanging basket
... and out front patio will be complete!

The next project was to hang our new light fixture in the kitchen.

Photos to come soon... I have a few other projects going on in there right now that I want to finish first!

My arms were entirely sore on Sunday and Garry needed my help holding the fixture up in the air while he did the wiring. Both of us were not at all thrilled that it took as long as it did (meaning, it took more than two minutes and both of us were sore from the previous day) but once the fixture was up, and we ran and got bulbs for it, we were surprised at how much light it brought to the room!

Our kitchen always seems really dark, so this will certainly help us in our quest to have better lighting in the kitchen. The next thought is to see if we can get a dimmer switch for that outlet so we can have soft "candlelit" dinners in our dining area. Maybe it will encourage us to eat in there more often.

Finally, I started working on painting the bathroom. Even though this is a small space, there was a LOT of prep work that needed to happen.

  • First we had to clear everything out of the bathroom and take down all of the outlet covers and towel bars.
  • Garry fixed the drywall where our old light switch used to be (before the electricians with the grant program came and moved the light switch to a safer location in the room) and reinstall the beadboard and trim. 
  • All of the holes were filled with joint compound (since I'm the Queen of Spackle this was no huge task) 
  • The floor was vacuumed 
  • The beadboard was scrubbed with a eraser sponge to get off any excess dirt or grime (you don't want to paint over crud) 
  • The floor and walls were taped with painter's tape
Finally, I was able to paint. 


It took a few hours because I ended up painting it by hand with a brush. See, trying to paint beadboard with a roller just wasn't working out for me, so I took my time and did it with my 2" brush. It took forever. 


One part of my prep work that I didn't think to do was to scrub the ever living daylights out of the toilet. Don't ask me what it was like practically sticking my head in it to paint behind it. It was not... pleasant. 

Even though it's kind of hard to tell - the white on the left-hand side of the photo is much brighter than the right-hand side. See, apparently the previous owner never painted the beadboard after installing it so it was just the pre-primed white. Oh well. It's bright and shiny white now! And since it's gloss paint, it's perfect for bathrooms. Since we keep the cat litter box in this room we need to be able to wipe down the walls without the dust from the litter staining (one of our cats will absolutely not use a litter box with a hood on it, so we've had to deal with a lot of litter flung everywhere) 

I have one more coat of the white paint to do and then I can add the color to the wall, reinstall all of the hardware and finally start putting artwork and what-not on the walls. Maybe I'll get some new, extremely fluffy towels for myself. 

Auron - almost 6 months

I realized the other day that my little ball of chaos wrapped in cuteness is not so little anymore...


We took him to the vet for his last (thank the gods) round of vaccines and he weighs in at about 55 lbs. He's over half of his final body weight.


His favorite toys are the skineeze kind (the really long ones without stuffing and more than one squeaker) and his favorite treat in the entire world is an ice cube (go figure). 


Some of his favorite activities include chasing the kitties (even though he's not supposed to), finding every possible way to be covered in water (which he is also not supposed to do - especially in the kitchen)...


But his favorite thing of all is what we call "big boy cuddles" where we let him up on our bed to cuddle for a little while before we all go to bed. 

It's hard to believe that he used to look like this a few months ago:

I know... part of me wishes he would have just stayed that size forever (especially the tendons in my arm as he pulls on the lead when I go to walk him). 

Why I'm not allowed to go to TJ Maxx by myself...

I've learned that TJ Maxx is an incredibly dangerous store to go into when I have a little money stashed aside and a mission.

When I was in Florida, I found this really adorable metal wire wall basket thing at Marshalls. For lack of a better idea for it, I thought it would make a perfect mail sorter. One of the biggest issues we have with clutter is mail being strewn about the living room. Even if the mail only makes it from the box, to the basket (which is like three steps - no joke) it's still better than either sitting in the mailbox or strewn across the living room.

I know it sounds silly, but I was obsessed with this metal mail sorter.

I figured I'd check TJ Maxx because it's the sister company to Marshall's and I thought I saw one there a while ago when I bought some summer clothes for myself.

Yesterday I found myself with a little extra time after work so off to TJ's I went.

I wandered back to the housewares section, my palms sweaty, my muscles twitching. I knew it had to be there and if not, then what was my plan - that mail sorter needed to be mine! I mean sure, I had backup plans, but in my mind - that piece I saw was perfection.

I know, I'm a weirdo.

The first aisle I went into had a lot of metal sorting things, I found a smaller, more decorative one, but the simplicity of this mail sorter (along with it's size to hold things like magazines and large envelopes) was what drew me to it. But - this was better than nothing.

As I rounded the corner, out of the corner of my eye... there it was! My mail sorter! Hiding underneath a bunch of other metal sorting things, it was waiting for me, calling my name. I practically lunged for it. I set down the other smaller metal sorter and a little old lady watched me as I (this is no joke folks) hugged the metal object to my chest and sweetly whispered "I'm so glad I found you" and then chuckled to herself and said "I hope you enjoy your... um... metal thing. It looks like you really wanted it."

Heck yeah I did!
I know, I'm weird for being obsessed over a very simple metal thing - but doesn't it look nice in my entryway?

Having only spent a few moments looking for my sorter, I figured I should look around the rest of the store. I'd say that it was a mistake if I only came away from it with useless stuff, but I managed to find some really great deals and useful items.

1. Recipe box:
Yay! Now I'll actually remember that chili recipe...
Garry always gets frustrated with me when I can't remember a recipe for something particularly delicious I made. I'm really terrible about remembering to type it up or write it down. Not to mention, I didn't have anything to store said recipe cards in.

I found this really cool-looking set of metal apothecary drawers. It fits perfectly on my countertop and 3x5 cards should fit nicely in there. I'll keep the cards and a pen/pencil in the drawers so I can write things down as I'm cooking. That way, no more forgotten recipes.

2. Glass "catch all" bowl:
For every thing a place and for every place a thing... wait that doesn't sound right.

While this bowl isn't probably supposed to be for "catch all" items and more for just being decorative, I realized that we have been using a cereal bowl for our "catch all" stuff for a while. Frankly, I was getting annoyed with it. This bowl was just the right size without being too big or too small and it's gorgeous to boot.

3. Rattan serving tray: (pictured above)
Since this was only $6, I figured it would look really nice under the glass bowl. It also provides a more stable "base" for the bowl than just our ottoman.

4. Soft blanket:
Cloud can't wait for it to be cool enough to curl up in the amazing softness that is this blanket

Okay, this is kind of weird, but in some of our previous living room photos you could see a blue/green chenille blanket. I loved that blanket. It was so comfortable - the perfect snuggle on the couch on a cold day with a cup of hot cocoa blanket. Well, it ripped. I tried to use it for a while, but the fabric kept fraying and, well, I just needed to give it up. *sigh* Even though I have about 6 or 7 other throw blankets in the house (of course, none of which match my living room or are soft and squishy like my chenille blanket) I decided that I needed another soft blanket because dammit, winter will be here soon. Yes I know it's not even August, but folks, I live in upstate New York.

5. Throw pillows:
Soft, squishy comfort

The ones I made when we moved into the house... are... well... done. See - I was the infinitely smart one who decided not to bother making an envelope style pillow case and therefore we couldn't really wash them. Yeah. Also, the actually pillow forms weren't really that comfy. They were more for just decoration than actual use. Basically, I needed something comfortable enough for long-term use, like napping through a marathon of Lord of the Rings on a Sunday afternoon.

Granted, I spent a good amount of money on these, they were still incredibly worth every cent. Don't get me wrong - I still got a pretty good deal on them.

6. Bath mat: (waiting for the finished bathroom reveal!)
I found a wood bathmat. Oh I lurve it. Basically our previous bathmat was past the point of no return. In other words, no amount of bleach or soap could fix it. Gross. And I knew this would only continue with fabric bath mats... so when I saw the wood version I snagged it!

7. Bath mats... part II:
Yes I bought three bath mats. Two of those mats were *supposed* to go under Auron's crate so one of my throw blankets could be relinquished (and washed). Unfortunately, Auron is too smart for his own good and figured out how to reach his paw through one of the slats in his crate, pull the mat into his crate and proceed to chew on it. The dumb part is - he has blankets in his crate and he doesn't chew on them. Not that I want him to chew on them, but it just seems odd that he only wants to chew on the fabric that's under his crate. Weird dog. Anyway, those bathmats are hiding in my closet until I figure out something to do with them. :-/

So that was my shopping excursion to TJ Maxx. Despite spending a LOT more than my original intent (I had only planned on getting the mail sorter) everything I bought (except for the to be determined bathmats) were needed and are useful.

I'm just glad we don't have a Kirkland's or World Market in town. It's bad enough that we also have a Pier 1 and Home Goods...

OH! and I purchased a pillowcase from Linda over at Drop Cloth Designs. The best part was I was able to get her to do a custom piece for me!
Yay! :D
I had her transfer our wedding monogram on a pillowcase. Mind you - this piece is nowhere NEAR as fancy as some of the work that she does (if I were to choose any non-custom pillow from her site it would hands-down be this one) but it has sentimental value to Garry and I and that's what mattered. Besides, I like simple. Simple is good.

So here's our living room with all of the pieces put together:

Little by little it's coming together. I just need another set of "main" curtains (to go infront of the sheers) and finish my lotus sculpture (under the shelves) as far as small projects - but we still have some big ones coming down the pipe (replacing all of the trim, building - or finding - a new tv console, and somehow... someway... getting a fireplace along the back wall). 

Wednesday, August 1, 2012

Let there be (kitchen) light!

Another project we've kind of put off is the kitchen lighting. To put it bluntly, it's pretty terrible and it's rather amazing that I haven't accidentally chopped a finger off because I couldn't see properly.

Let's face it, my eyes aren't the best out there, but the stove/counter top area of our kitchen is so dark that in the winter-time (when it's dark before 5 p.m.) it's really hard to see what you're doing - which is really not safe. We thought of getting under cabinet lights, but those can be a pain to install and that doesn't necessarily help us with the overhead lighting issue either.

The light over our dining area is not really centered and just looks plain weird.

Did I mention both of these are boob lights? Not just any boob lights, but fancy carved wood boob lights. As pretty as they are... I'm just not a fan of lights that remind me of biology class.

I mean they're not horrible, they're just not "us." Well, Garry would argue... but then again, he could care less so long as the lights work he's a happy camper.

I went on another little excursion yesterday to our local Lowes. There were a few things I wanted to pick up to work on the bathroom and get an idea for pricing for a few other projects - when I saw the light fixture that I desperately wanted for the dining area.

Photo from the Lowes.com website

Yeah, I know, it's incredibly simple. But honestly folks, that's exactly what I'm going for. Our dining space isn't huge and I figured that keeping the lighting simple would make things easier for us as far as making it look less cluttered.

At some point this week Garry is going to install it.

We've also decided on track lighting for the other portion of the kitchen - we just need to measure and decide what the best way to go is going to be. Since the actual fixture is as far away from the "cooking area" as it can be without being in the "dining area," we may have to look at other options (like moving the electrical box) if we can't use track lighting to fix the problem.

The rest of this week will be spent working late and this weekend - bathroom painting begins! I'm really excited to get the bathroom that much closer to completion.

I also picked up some brackets to hang the reclaimed wood shelf that I've been dreaming of doing (since we bought the house) in the kitchen, so that may happen this weekend too. Once we get the shelf and lights hung, the next thing for the kitchen (and many other rooms in the house) is textiles.